Docker之利用 Dockerfile构建 Redis 服务的教程
Dockerfile
ENV REDIS_VERSION=3.2.1
ENV REDIS_DOWNLOAD_URL=http://download.re*d**is.io/releases/redis-${REDIS_VERSION}.tar.gz
REDIS_DOWNLOAD_SHA1=26c0fc282369121b4e278523fce122910b65fbbf
RUN
REDIS_FILE=${REDIS_DOWNLOAD_URL##*/} &&
mkdir /tmp/redis &&
cd /tmp/redis &&
curl -Lk "$REDIS_DOWNLOAD_URL" -o ${REDIS_DOWNLOAD_URL##*/} &&
tar xf ${REDIS_DOWNLOAD_URL##*/} &&
cd ${REDIS_FILE%.tar*} &&
#yum install -y http://cbs.*c**entos.org/kojifiles/packages/jemalloc/3.6.0/1.el7/x86_64/jemalloc-3.6.0-1.el7.x86_64.rpm
#http://cbs.c**en*tos.org/kojifiles/packages/jemalloc/3.6.0/1.el7/x86_64/jemalloc-devel-3.6.0-1.el7.x86_64.rpm &&
yum install jemalloc-devel -y &&
make -j $(awk '/processor/{i++}END{print i}' /proc/cpuinfo) &&
mkdir -p /usr/local/redis/{bin,etc,var} &&
cp -af src/{redis-benchmark,redis-check-aof,redis-check-rdb,redis-cli,redis-sentinel,redis-server} /usr/local/redis/bin/ &&
cp -a redis.conf /usr/local/redis/etc/ &&
echo "export PATH=/usr/local/redis/bin:$PATH" > /etc/profile.d/redis.sh &&
source /etc/profile.d/redis.sh &&
useradd -r -s /sbin/nologin -c "Redis Server" -d /data -m -k no redis &&
#chmod +x /usr/local/redis/bin/entrypoint.sh &&
yum clean all &&
rm -rf /tmp/redis
COPY entrypoint.sh /usr/local/redis/bin/entrypoint.sh
RUN chmod +x /usr/local/redis/bin/entrypoint.sh
VOLUME ["/data"]
WORKDIR /data
EXPOSE 6379/tcp
ENTRYPOINT ["/usr/local/redis/bin/entrypoint.sh"]
CMD ["redis-server"]
entrypoint.sh 脚本
#!/bin/bash
#########################################################################
# File Name: entrypoint.sh
# Author: LookBack
# Email: admin#dwhd.org
# Version:
# Created Time: 2016年06月30日 星期四 19时38分40秒
#########################################################################
if ! which redis-server >/dev/null 2>&1; then source /etc/profile.d/redis.sh;fi
set -e
sysctl -w net.core.somaxconn=1024 >/dev/null 2>&1
sysctl -w vm.overcommit_memory=1 >/dev/null 2>&1
echo never > /sys/kernel/mm/transparent_hugepage/enabled
echo never > /sys/kernel/mm/transparent_hugepage/defrag
# first arg is `-f` or `--some-option`
# or first arg is `something.conf`
if [ "${1#-}" != "$1" ] || [ "${1%.conf}" != "$1" ]; then
set -- redis-server "$@"
fi
# allow the container to be started with `--user`
if [ "$1" = 'redis-server' -a "$(id -u)" = '0' ]; then
chown -R redis .
#exec gosu redis "$0" "$@"
fi
if [ "$1" = 'redis-server' ]; then
# Disable Redis protected mode [1] as it is unnecessary in context
# of Docker. Ports are not automatically exposed when running inside
# Docker, but rather explicitely by specifying -p / -P.
# [1] https://github.com/antirez/redis/commit/edd4d555df57dc84265fdfb4ef59a4678832f6da
doProtectedMode=1
configFile=
if [ -f "$2" ]; then
configFile="$2"
if grep -q '^protected-mode' "$configFile"; then
# if a config file is supplied and explicitly specifies "protected-mode", let it win
doProtectedMode=
fi
fi
if [ "$doProtectedMode" ]; then
shift # "redis-server"
if [ "$configFile" ]; then
shift
fi
set -- --protected-mode no "$@"
if [ "$configFile" ]; then
set -- "$configFile" "$@"
fi
set -- redis-server "$@" # redis-server [config file] --protected-mode no [other options]
# if this is supplied again, the "latest" wins, so "--protected-mode no --protected-mode yes" will result in an enabled status
fi
fi
exec "$@"

如果需要基于此dockerfile基础上自己build,那么需要pull benyoo/centos:7.2.1511.20160630这个系统镜像,因为为了安装编译环境和尽可能的简写image的大小,我直接自己封了CentOS7.2.1511的系统image
如果不pull benyoo/centos:7.2.1511.20160630这个系统镜像,那么需要自己在CentOS系统镜像上完善编译环境。
使用方法:
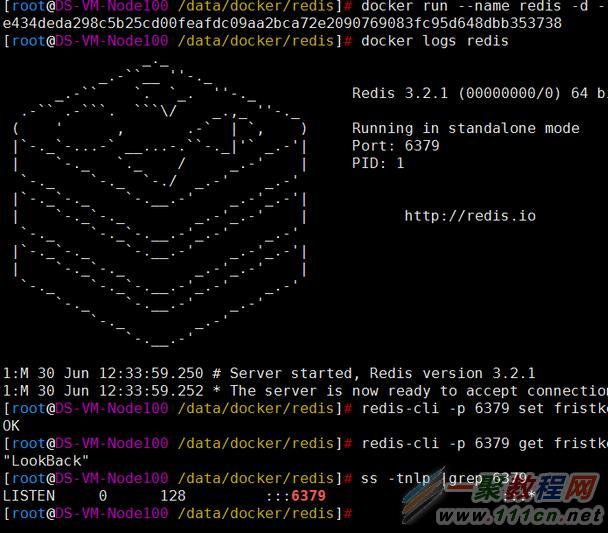
docker run --name redis -d --privileged -p 6379:6379 benyoo/redis:3.2.1
--privileged参数是必须要的,因为启动redis服务的时候需要修改系统内核参数,如果不加在修改内核参数的时候会提示这是只读文件的错误
持久化存储:
docker run --name redis-server --privileged -p 6379:6379 -d benyoo/redis:3.2.1 --appendonly yes
如果想存在宿主机的存储上可以使用-v来挂载目录
docker run --name redis-server --privileged -p 6379:6379 -v /data/redis:/data -d benyoo/redis:3.2.1 --appendonly yes


