JQuery select控件操作使用总结
JQuery获取和设置Select选项方法汇总如下:
获取select
先看看下面代码:
$("#select_id").change(function(){//code...}); //为Select添加事件,当选择其中一项时触发
var checkText=$("#select_id").find("option:selected").text(); //获取Select选择的Text
var checkValue=$("#select_id").val(); //获取Select选择的Value
var checkIndex=$("#select_id ").get(0).selectedIndex; //获取Select选择的索引值
var maxIndex=$("#select_id option:last").attr("index"); //获取Select最大的索引值
$("#select_id ").get(0).selectedIndex=1; //设置Select索引值为1的项选中
$("#select_id ").val(4); //设置Select的Value值为4的项选中
$("#select_id option[text='jQuery']").attr("selected", true); //设置Select的Text值为
jQuery的项选中
获取select 选中的 text :
$("#ddlRegType").find("option:selected").text();
获取select选中的 value:
$("#www111cnnet").val();
获取select选中的索引:
$("#www111cnnet").get(0).selectedIndex;
设置select
jQuery添加/删除Select的Option项:
$("#select_id").append("Text"); //为Select追加一个Option(下拉项)
$("#select_id").prepend("请选择"); //为Select插入一个Option(第一个位置)
$("#select_id option:last").remove(); //删除Select中索引值最大Option(最后一个)
$("#select_id option[index='0']").remove(); //删除Select中索引值为0的Option(第一个)
$("#select_id option[value='3']").remove(); //删除Select中Value='3'的Option
$("#select_id option[text='4']").remove(); //删除Select中Text='4'的Option
设置select 选中的索引:
//index为索引值
$("#www111cnnet").get(0).selectedIndex=index;
设置select 选中的value:
$("#www111cnnet").attr("value","Normal");
$("#www111cnnet").val("Normal");
$("#www111cnnet").get(0).value = value;
设置select 选中的text:
var count=$("#www111cnnetoption").length;
for(var i=0;i
{ if($("#www111cnnet").get(0).options[i].text == text)
{
$("#www111cnnet").get(0).options[i].selected = true;
break;
}
}
清空 select:
$("#www111cnnet").empty();
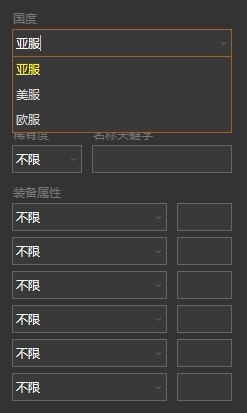
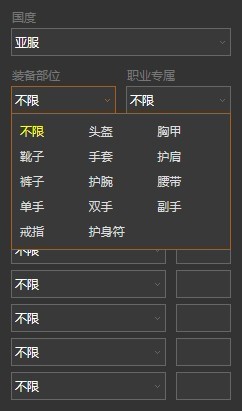
上面我们介绍了关于jquery+select/">jquery select控件的取值,清空,赋值,删除与增加方法,下面我来来谈一下怎么美化select控件
在这将本人对的美化方法共享出来。
优点: 仍保留使用,仅改变外观,不改变不干预Form行为,后期加载JS。(注:本脚本依赖jQuery)
啥也不说了,都在代码里。
$(document).ready(function () {
// 找出需要美化的标记,我们用一个class名称 “beautify” 来确定,没有这个样式的则将被忽略
var selects = $(“select.beautify”);
if (selects.length > 0) {
//先在代码底部增加一个
$(“body”).append(“”);
//挨个美化呗
selects.each(function () {
//给本函数下的 this (也就是 ) 设置一个别名,在下面的匿名函数中将会被用到
var select = this;
//创建一个 , .dummy 将用于我们对此类 进行专门样式定义
//同时将 的部分属性和样式复制给这个 dummy input
//创建完后,将这个 插入 dom, 紧跟原
var input = $(“”)
.attr(“disabled”, this.disabled)
.css(“width”, parseInt(this.style.width) + “px”)
.css(“display”, this.style.display)
.insertAfter(this)
.val(this.options[this.selectedIndex].text);
//将 藏掉,不要在 .beautify 中去定义 display:none, 因为js加载失败时,我们还得用上它
this.style.display = “none”;
// 当 被点击时
input.click(function () {
//调出前面创建的
//将 的样式表传递给它,当需要对这个
var div = $(“#dummydata”)
.empty()
.attr(“class”, select.className);
//设置
//在这里我们判断一个特殊的class名 “extend”
//如果带有 .extend,表示宽度将受额外自定义控制;否则,宽度将默认与 一致
$(select).hasClass(“extend”)
? div.css(“width”, “”)
: div.css(“width”, $(this).innerWidth());
//将 复制到
for (var i = 0; i < select.options.length; i++) {
var item = select.options;
var a = $(“javascript:void(0);’ class=’nowrap’>”)
.css(“color”, item.style.color)
.addClass(item.className)
.html(item.text)
.appendTo(div);
if (i == select.selectedIndex) {
a.addClass(“selected”);
}
//当选项被点击时, 内容显示为对应 ,关闭
a.click(function () {
var n = $(this).index();
select.selectedIndex = n;
input.val(select.options[n].text);
div.hide();
$(select).change();
});
}
//在这里我们判断一个特殊的class名 “noscroll”
//当选项过多时,默认会让选项列表出现滚动条;但如果有 .noscroll 修饰,则强制不出现滚动条
var noscroll = (select.options.length < 10 || $(select).hasClass(“noscroll”));
if (/msie 6/i.test(window.navigator.userAgent)) {
div.css(“height”, noscroll ? “auto” : “215px”).css(“overflow-y”, noscroll ? “hidden” : “scroll”);
} else {
div.css(“max-height”, noscroll ? “10000px” : “215px”);
}
//在这里我们判断一个特殊的class名 “onside”
//如果有 .onside 修饰,弹出的选项层将在侧面,否则是在下面
//注: 此处用到2个函数 locateBeside 和 locateBelow 是本人js库中的方法,稍等另外给出
$(select).hasClass(“onside”)
? div.locateBeside(this, -2)
: div.locateBelow(this, -4);
//对反复点击 之类的事情,做一些智能调节
if (window.activeDummySelect == select) {
div.slideToggle(100);
} else {
div.hide().slideDown(100);
window.activeDummySelect = select;
}
//在有滚动条的情况下,我们需要将滚动条滚动到当前选中项的位置
if (!select.selectedIndex > 6 && div[0].scrollHeight > div.height()) {
div.scrollTop((select.selectedIndex - 3) * div[0].firstChild.offsetHeight);
}
});
});
//最后别忘了:点击网页上的游离区域时,应该隐藏
$(document).click(function (e) {
if (!$(e.target).is(“.dummy”) && !$(e.target).is(“#dummydata”)) {
$(“#dummydata”).hide();
}
});
}
});
上面代码里说用到了2个方法: locateBeside 和 locateBelow, 是本人js库中对 jQuery 的扩展,顺便多赠送2个方法 locate 和 locateCenter
:-) 代码如下:
| 代码如下 | 复制代码 |
| $.fn.extend({ locate: function (x, y) { if (this.css(“position”) == “fixed”) { y -= $(document).scrollTop(); } return this.css({ left: x, top: y }); }, locateBeside: function (el, adjustX) { var p = $(el).offset(), w1 = $(el).outerWidth(), w2 = this.outerWidth(), h2 = this.outerHeight(), x = p.left + w1 + 5 + (adjustX || 0), y = p.top; if ($(document).width() < x + w2) { x = p.left – w2 – 5 – (adjustX || 0); } if ($(document).height() < y + h2) { y = p.top – (y + h2 + 15 - $(document).height()); } return this.locate(x, y); }, locateBelow: function (el, adjustY) { var p = $(el).offset(); return this.locate(p.left, p.top + $(el).outerHeight() + 3 + (adjustY || 0)); }, locateCenter: function () { return this.locate( ($(window).width() - this.width()) / 2, ($(window).height() - this.height()) / 2 + $(document).scrollTop() ); } }); |
|
最后给出一些样式表定义的例子,以及演示效果:
| 代码如下 | 复制代码 |
|
input.dummy { background-image: url(/static/images/combo.gif); background-position: right 12px; background-repeat: no-repeat; cursor: pointer !important; } |
|