SpringBoot接口超时设置步骤与异常解决方案
作者:袖梨
2026-05-25
SpringBoot接口超时配置是开发中常见需求,掌握正确设置方法能有效提升系统稳定性。本文将详细介绍从配置到异常处理的全流程。
SpringBoot控制接口超时设置
实现接口超时控制主要分为三个关键步骤:
- 1.配置
- 2.接口定义
- 3.异常处理
1.配置
在SpringBoot项目中设置基础超时配置时,需注意单位是毫秒:
spring:
  mvc:
    async:
      request-timeout: 2000 //单位是毫秒哦 2000代表2秒
特别注意:要使配置生效,必须符合对应的接口规范要求。
2.接口定义
定义超时接口需要满足两个核心条件:
首先必须是异步接口,需要单独开启线程执行;其次返回值必须使用Callable<T>泛型,其中T为实际返回的数据类型。
/**
 * 超时测试接口标准写法
 *
 * @return 必须返回Callable<T>类型
 */
@GetMapping("/test")
public Callable<ResultVO> timeOutMethod() {
    return new Callable<ResultVO>() {
        @Override
        public ResultVO call() throws Exception {
            Thread.sleep(10000); //触发超时
            return ResultVO.response(ReturnEnum.PAY_TOP_UP_ORDER, String.valueOf(new IdWorker().nextId()));
        }
    };
}
3.异常处理
通过捕获AsyncRequestTimeoutException异常,可实现统一的超时处理逻辑:
@ControllerAdvice
public class BaseExceptionAdvice {

    @ExceptionHandler(AsyncRequestTimeoutException.class)
    public ResponseEntity<JSONObject> handException(AsyncRequestTimeoutException e) {
        JSONObject jsonObject = new JSONObject();
        jsonObject.put("timestamp", DateTime.now().toString("yyyy-MM-dd HH:mm:ss"));
        jsonObject.put("status", 500);
        jsonObject.put("message","接口超时");
        return ResponseEntity.status(HttpStatus.BAD_REQUEST).body(jsonObject);
    }
}
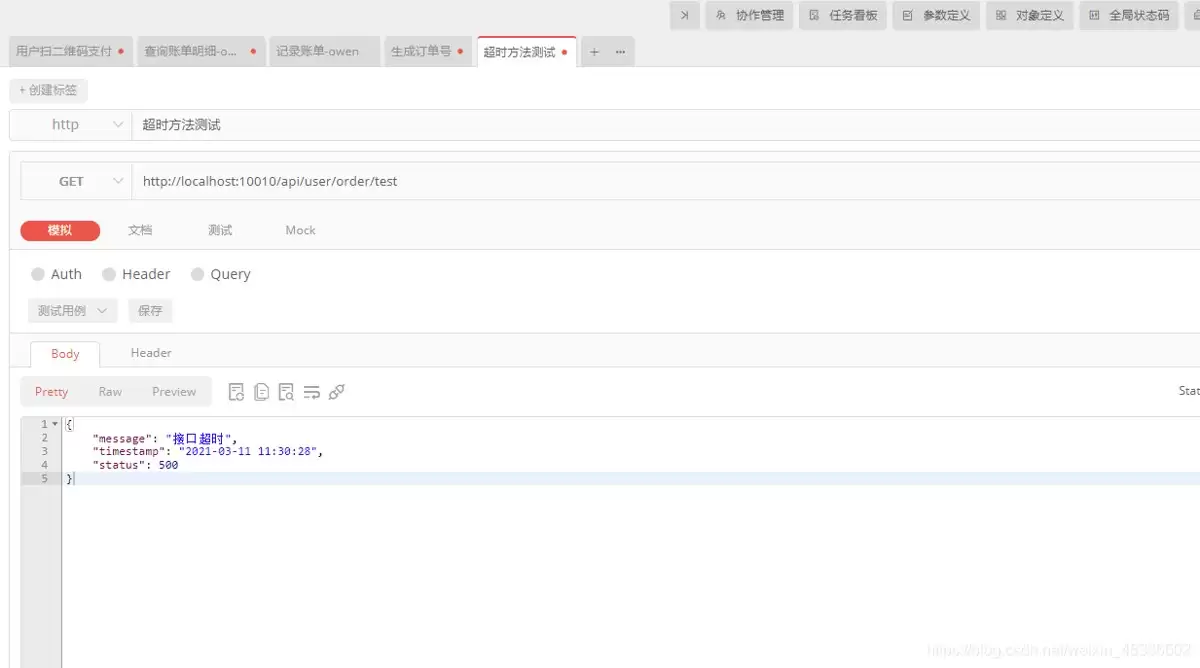
实际效果
系统会返回规范化的超时错误提示。
总结
本文详细介绍了SpringBoot接口超时的完整配置流程,掌握这些方法能有效优化接口响应机制,建议开发者根据实际需求灵活应用。
- SpringBoot API接口超时时间的五种配置方式详解
- springboot配置请求超时时间(Http会话和接口访问)
- Springboot调整接口响应返回时长详解(解决响应超时问题)
- SpringBoot设置接口超时的方法小结
- SpringBoot设置接口超时时间的方法