CSS3实现鼠标经过元素滑动效果
作者:袖梨
2022-06-25
效果如下(图1未经过时状态,图2为鼠标经过元素时效果)
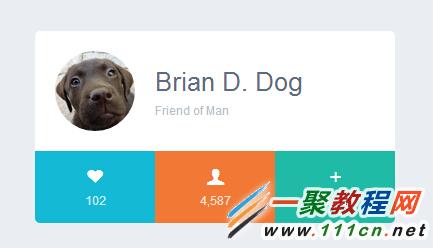
图1
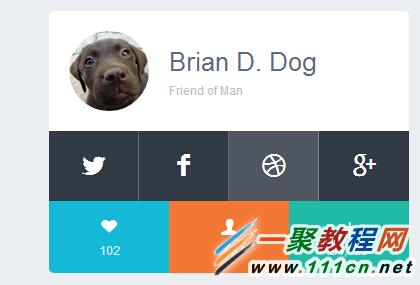
图2
HTML代码
| 代码如下 | 复制代码 |
Brian D. DogFriend of Man |
|
CSS代码
首先我们引入字体图标,这里使用的是weloveiconfonts提供的字体。
| 代码如下 | 复制代码 |
| @import url(/api/?family=entypo); 给HTML元素设置默认的样式 body { margin: 100px; font-family: helvetica, sans-serif; background: #eaedf1; font-size: 10px; } a { text-decoration: none; transition: all .4s; } 给元素添加样式 .container { width: 360px; margin: 0 auto; } /* open body on :hover */ .container:hover .body { height: 70px; } /* the HEAD stuffs */ .head { overflow: auto; padding: 20px; background: #fff; border-radius: 5px 5px 0 0; font-size: 1.2em; color: #b9becd; } .head:before { content: ""; display: block; float: left; width: 80px; height: 80px; margin-right: 20px; background: url("/000/0/6525182/il_570xN.345773300.jpg") no-repeat; background-size: 80px; border-radius: 100%; } .head h1 { margin: 15px 0 5px; font-weight: 100; font-size: 2.2em; color: #5e6d81; } /* the BODY stuffs */ .body { height: 0; background: #323a45; color: #fff; vertical-align: middle; transition: all .3s; } .body a { display: inline-block; width: 25%; height: 100%; padding: 20px; border-right: 1px solid rgba(255,255,255,.25); text-align: center; color: #fff; font-size: 2.5em } .body a:hover { background: #515761; } .body a:last-child { border-right: none; } /*.bodyOpen { height: auto; }*/ /* the FOOT stuffs */ .foot { /*height: 100px;*/ } [class^="footItem"] { display: inline-block; width: 33.333333%; padding: 15px 0; text-align: center; color: rgba(255,255,255,.8); font-size: 1.1em; } [class^="footItem"] span { display: block; font-size: 1.6em; margin-bottom: 5px; color: #fff; } .footItem1 { background: #14b9d6; border-radius: 0 0 0 5px; } .footItem1:hover { background: #5bcee2; } .footItem2 { background: #f27935; } .footItem2:hover { background: #f6a172; } .footItem3 { background: #1fbba6; border-radius: 0 0 5px 0; } .footItem3:hover { background: #63d0c1; } |
|
好了到了这里效果就介绍完了,当然css3还有大量的动画效果,大家可到官方学习学习。

